Quick Answer
Payment QR codes come in four main types: peer-to-peer apps (Venmo, Cash App), bank-native transfers (Zelle), contactless wallets (Apple Pay, Google Pay), and payment processor links (Stripe, Square). The best choice depends on your customer base, transaction size, and how much you want to pay in fees.
The last time I was in India, I noticed something striking. Nearly every vendor, from street food carts to taxi drivers to small shops, had a QR code pasted on a piece of cardboard. Customers would scan it with Google Pay, PhonePe, or Paytm (all running on India’s UPI system), and the payment was done in seconds. No cash, no card readers, no apps to fumble with. I didn’t have an Indian mobile number, so I couldn’t pay that way myself. I’d ask a family member to scan and pay, then hand them cash. It felt like watching the future of small business payments play out at street level.
Back in the US, the picture is messier. We don’t have a single system like UPI. Instead there’s Venmo, Zelle, Cash App, Apple Pay, Google Pay, Stripe, Square, and PayPal, each with different apps, different fee structures, and different customer bases. When I’ve paid contractors through Venmo or Zelle, they usually just pulled up a QR code on their phone for me to scan. Simple enough one-on-one. But for a business that needs a printed code at a register or on a sign, the question gets more complicated: which payment method do you pick?
That’s what this guide sorts out.
The Four Types of Payment QR Codes
1. Peer-to-Peer Apps (Venmo, Cash App)
The QR code contains your username or a profile URL. When scanned, it opens the app on the customer’s phone with your profile ready to receive payment. The customer enters an amount and confirms.
Fees:
- Personal accounts: Usually free
- Business accounts: Venmo charges about 1.9% + $0.10 per transaction
- Instant transfer to bank: small additional fee
2. Bank-Native Transfers (Zelle)
Similar concept, but Zelle is built into most major bank apps. The QR code contains your registered email or phone number. When scanned, it opens Zelle within the customer’s banking app with your details pre-filled.
Fees:
- No fees for sending or receiving
- Funds move directly between banks
- No instant transfer delay
3. Contactless Wallets (Apple Pay, Google Pay)
This is where confusion happens. Apple Pay and Google Pay primarily use NFC (tap-to-pay) through point-of-sale terminals. QR codes don’t trigger NFC transactions directly. A QR code can link to a payment page that accepts Apple Pay as a checkout option, but it’s not the same as “paying with Apple Pay via QR code.”
Fees:
- Determined by your payment processor, not Apple or Google
- Typically same as card processing rates (2-3%)
4. Payment Processor Links (Stripe, Square, PayPal)
Your payment processor generates a hosted checkout page. The QR code links to that page. Customers can pay using any method the page supports: cards, wallets, or bank transfers.
Fees:
- Processor dependent, typically 2.9% + $0.30 per transaction
- May include additional fees for international cards
Side-by-Side Comparison
| Method | Best For | Fees | Speed |
|---|---|---|---|
| Venmo | Tips, small amounts, casual | 0-1.9% | Instant in app |
| Zelle | Service payments, local business | Free | Minutes to instant |
| Apple Pay/Google Pay | Retail, restaurants with POS | 2-3% | Immediate |
| Payment Links (Stripe, Square) | Invoices, deposits, online | 2.5-3.5% | Immediate |
On a $50 payment, the difference is real: Zelle costs nothing, Venmo Business takes about $1.05, and a payment link processor takes roughly $1.75-$2.00. Over 100 transactions a month, Zelle saves $175-$200 compared to payment links.
When Each Method Works Best
Venmo: Casual, Social, Small Amounts
Venmo works well for tips at coffee shops, splitting bills at group events, small service providers like dog walkers or cleaners, pop-up sales, and farmers markets. The app is already on many phones, especially for customers under 40. Scanning a QR code feels natural in those contexts.
The limitation is that Venmo is US-only, business accounts have fees, and some customers find business transactions on Venmo a little informal.
Zelle: Zero Fees, Bank-to-Bank
Zelle stands out for service businesses where the fee savings matter. Plumbers, cleaners, contractors, tutors. Since it’s built into most banking apps, customers don’t need to download anything new.
When I’ve used Zelle to pay contractors, the process was fast and there was no fee on either side. The downside is that Zelle doesn’t have a dedicated app with a shareable profile URL the way Venmo does. You’re sharing an email or phone number, which works but feels less polished.
Apple Pay and Google Pay: Not Really QR Code Payments
This is the most misunderstood category. If you search “Apple Pay QR code,” you’ll find a lot of confusion. Apple Pay uses NFC, not QR codes. You can create a QR code that links to a checkout page that accepts Apple Pay as an option, but the QR code itself doesn’t process an Apple Pay transaction.
If you already have a point-of-sale terminal with tap-to-pay, Apple Pay and Google Pay work great through that. QR codes don’t add much here.
Payment Links: Universal but Expensive
Stripe, Square, and PayPal let you generate checkout links that accept virtually any payment method. A QR code pointing to a Stripe Payment Link is the most flexible option. Customers can pay with cards, wallets, or bank transfers.
The trade-off is fees. At 2.9% + $0.30 per transaction, you’re paying for that flexibility. For remote invoicing or deposits where the customer isn’t physically present, payment links make the most sense because you can’t hand someone a QR code.
What I Found Testing These on StackQR
I generated QR codes for each payment type on StackQR to see how they work in practice.
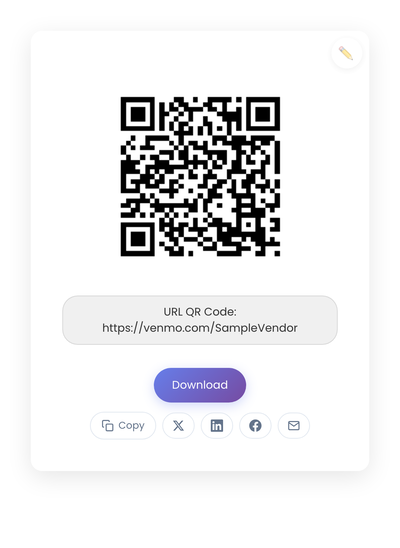
Venmo: Generate a QR code for your Venmo profile URL (venmo.com/yourusername). When scanned, it opens the Venmo profile. The key is using your real username, since a wrong URL goes to an error page.
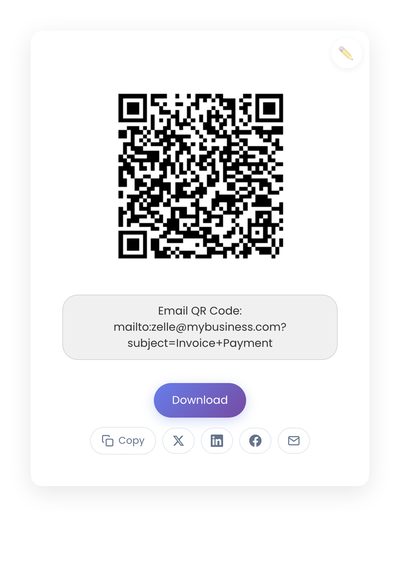
Zelle: Zelle doesn’t have profile URLs like Venmo. Instead, you can generate an email QR code with your Zelle-registered email, which opens a compose window. Not as smooth as Venmo’s direct profile link, but it works.
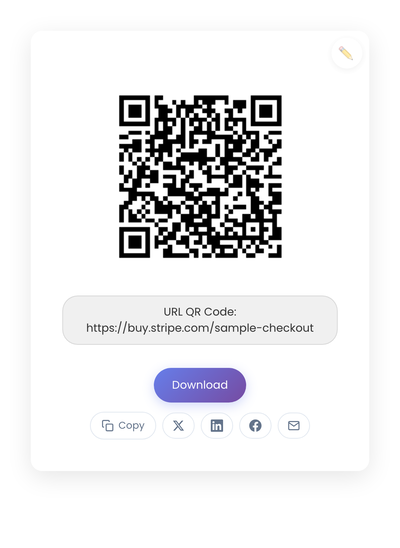
Payment Link (Stripe): Generate a QR code for your Stripe Payment Link URL. When scanned, it opens the hosted checkout page. This is the cleanest experience for the customer since the page handles everything.
All three are static QR codes. They don’t expire and don’t require a subscription to keep working. The only thing that changes them is if you change the underlying account or URL.
The Real Decision: Who Are Your Customers?
The fee comparison matters, but it’s not the whole picture. The real question is what your customers already use.
If your customers are under 40 and in the US, many already have Venmo. A Venmo QR code at your register or on your business card removes friction.
If your customers skew older or prefer banking apps, Zelle is already on their phone (inside their bank’s app). No download, no new account.
If you need to accept payment from anyone regardless of what apps they have, a payment link QR code is the safest bet because it accepts cards, wallets, and bank transfers.
Most small businesses benefit from having two options available: Zelle for fee-conscious repeat transactions, plus either Venmo or a payment link for broader coverage. Label each code clearly so customers know what they’re scanning.
Static QR Codes Are the Right Fit for Payments
Your Venmo username, Zelle email, and payment link URL all stay the same. There’s no reason to pay for dynamic QR codes that let you change destinations. If your payment details change, just generate a new code.
Static codes work permanently, require no subscription, and don’t depend on a third-party service to keep routing correctly. For something as important as getting paid, that reliability matters.
For more on the difference, see Static vs Dynamic QR Codes.
A Note on Security
Payment QR codes should be treated with the same care as displaying your email or phone number publicly.
Verify every code before displaying it by scanning it yourself and confirming it goes to your actual profile or payment page. In public spaces, check your displayed codes periodically to make sure nothing has been placed over them (sticker attacks redirect payments to someone else). Keep your Venmo privacy settings reviewed, since your profile is public by default.
Making the Decision
If fees are your priority, start with Zelle. If convenience matters most for your customers, Venmo or a payment link is the safer bet. If you’re invoicing remotely, a Stripe or Square payment link is the most professional option.
You don’t need to overthink this. Pick what your customers already use, print the QR code, label it clearly, and test it before putting it out. The point is getting paid with less friction, not optimizing every basis point.